
Featured
Garden Clearance & Fencing
Review

Back Garden Customer Case Study from Start to Finish
Background to Project
The customer moved into their property in August, during a summer season. At the time, the back garden featured a wooden shed, wooden fencing on both sides, and a grass lawn. It wasn’t until winter that the customer discovered the garden had poor drainage, resulting in swamp-like conditions, conditions they put up with for nearly 2 years before deciding to renovate.
Following a site visit and inspection, we discussed the customer's preferences. They requested the removal of the wooden fencing on both sides and the shed, as both were deteriorating due to rot. The customer opted to have cavity block walls constructed around the garden, a concrete base installed for a Steeltech shed, and large porcelain tiles laid throughout the garden.
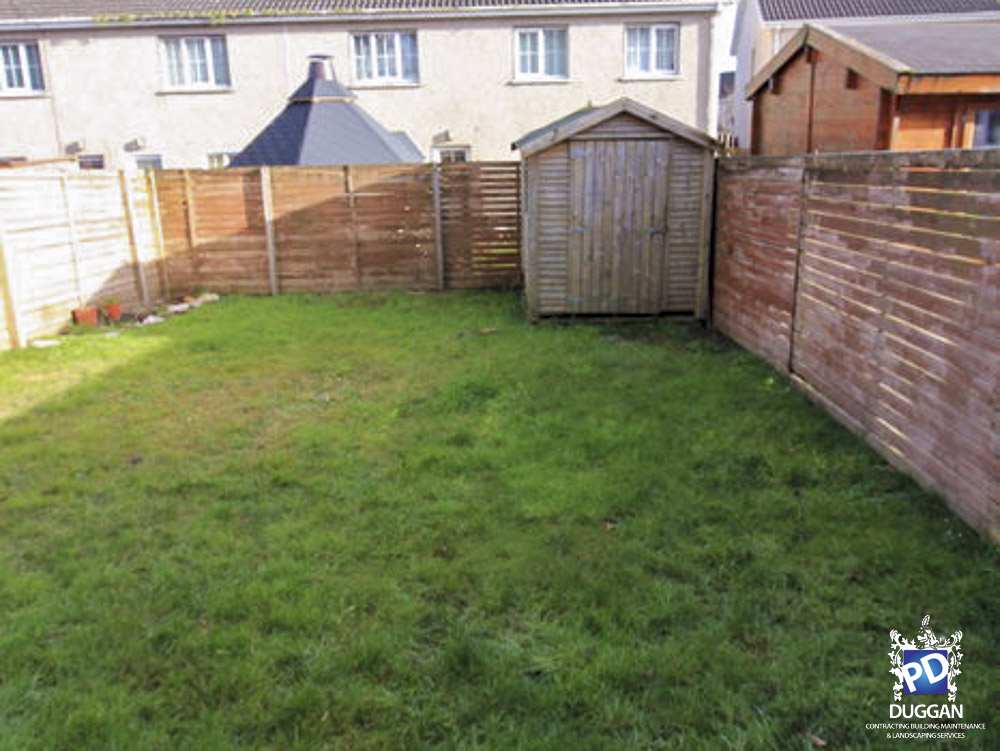
Garden in Summer
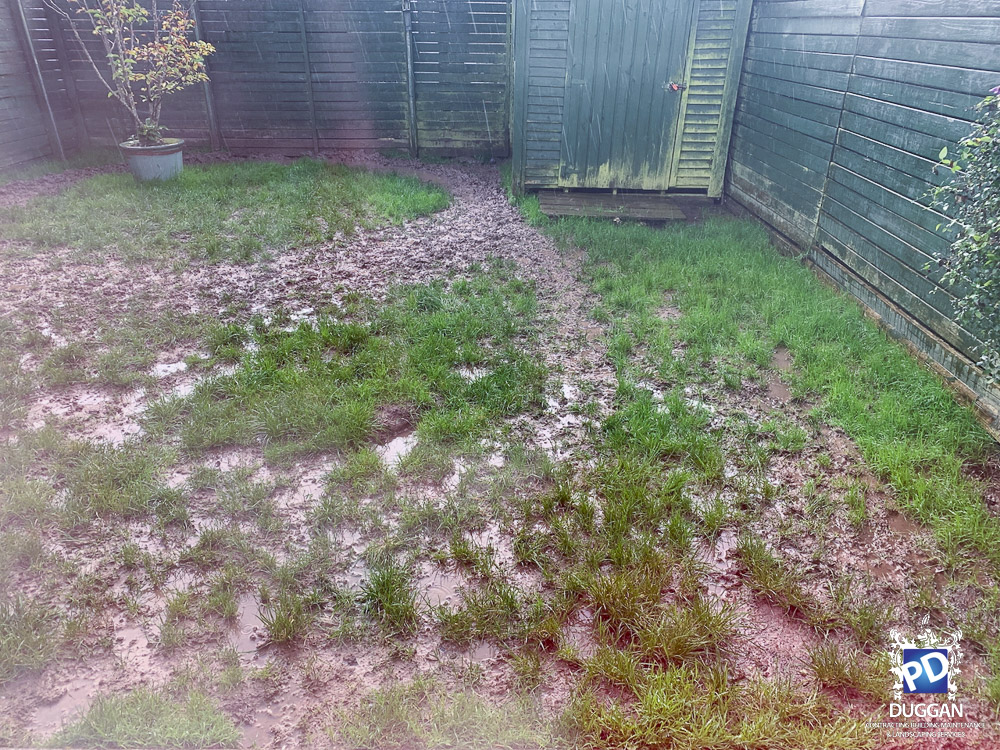
Garden in Winter
The winter photograph clearly highlights the poor drainage in the soil—a common issue due to modern construction practices, where the ground often lacks sufficient soakage.
Stage 1: Demolition of Shed and Fencing
The shed and the communal fences on the left and right sides, which were completely rotten, were dismantled and removed. The rear fence remained in place, as it spans multiple properties.
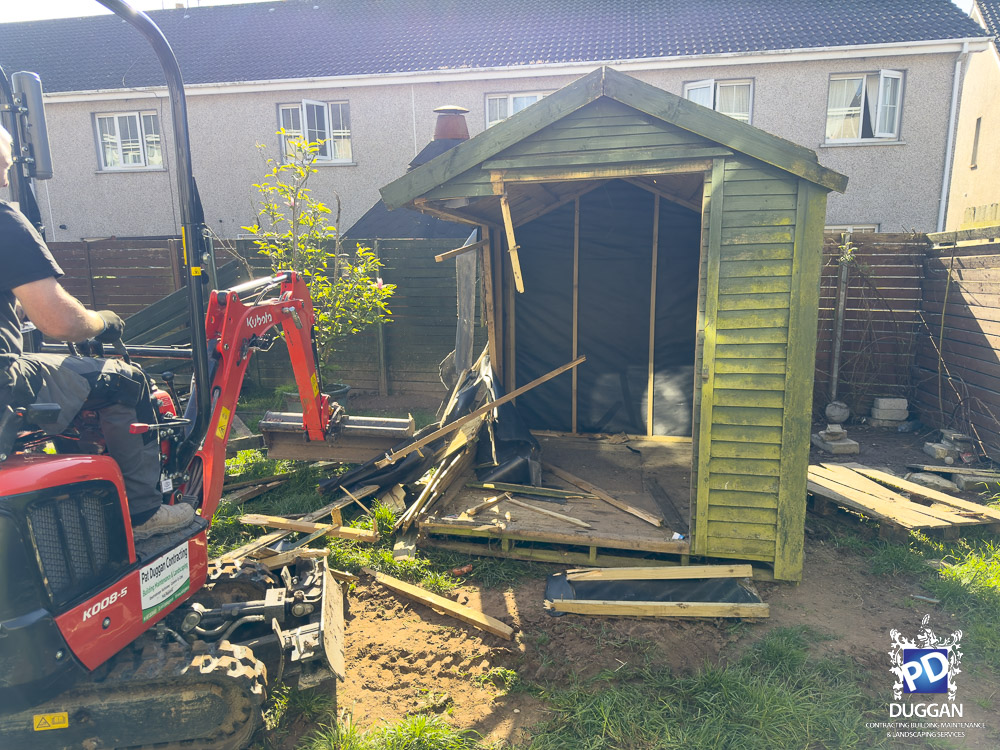
Demolition of Shed
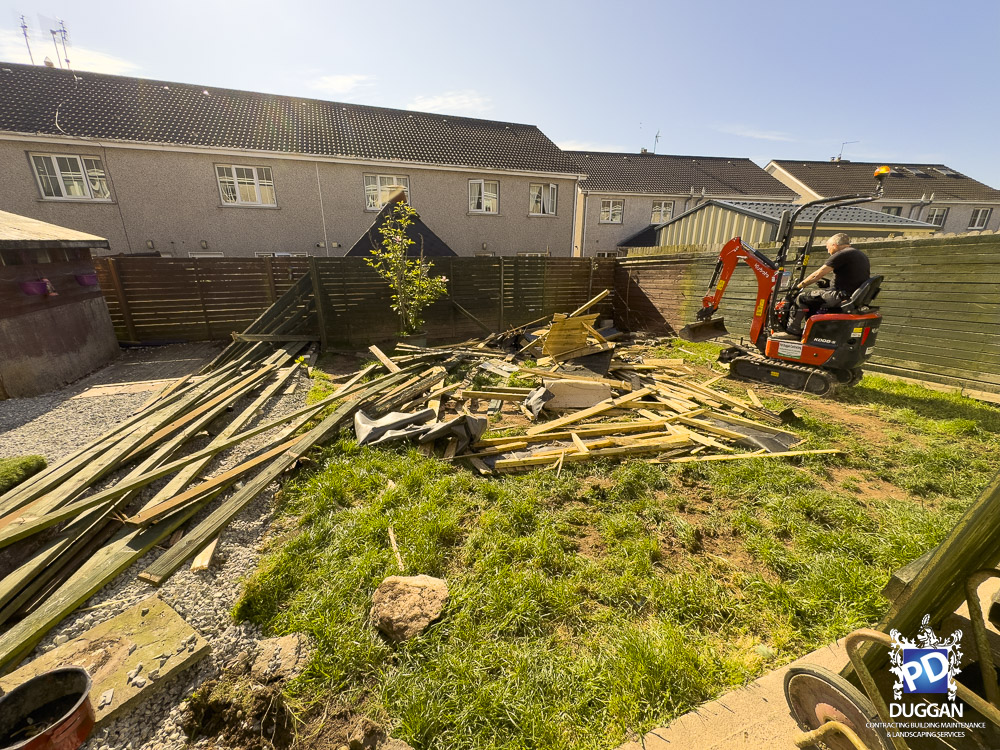
Demolition of Fence
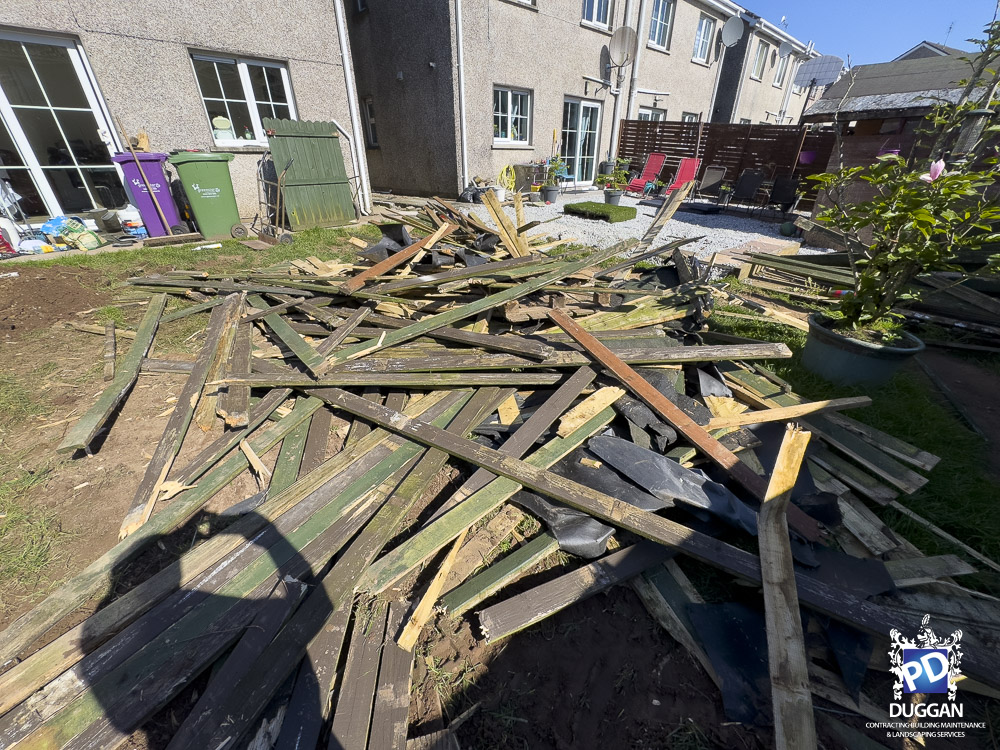
Demolition of Fence
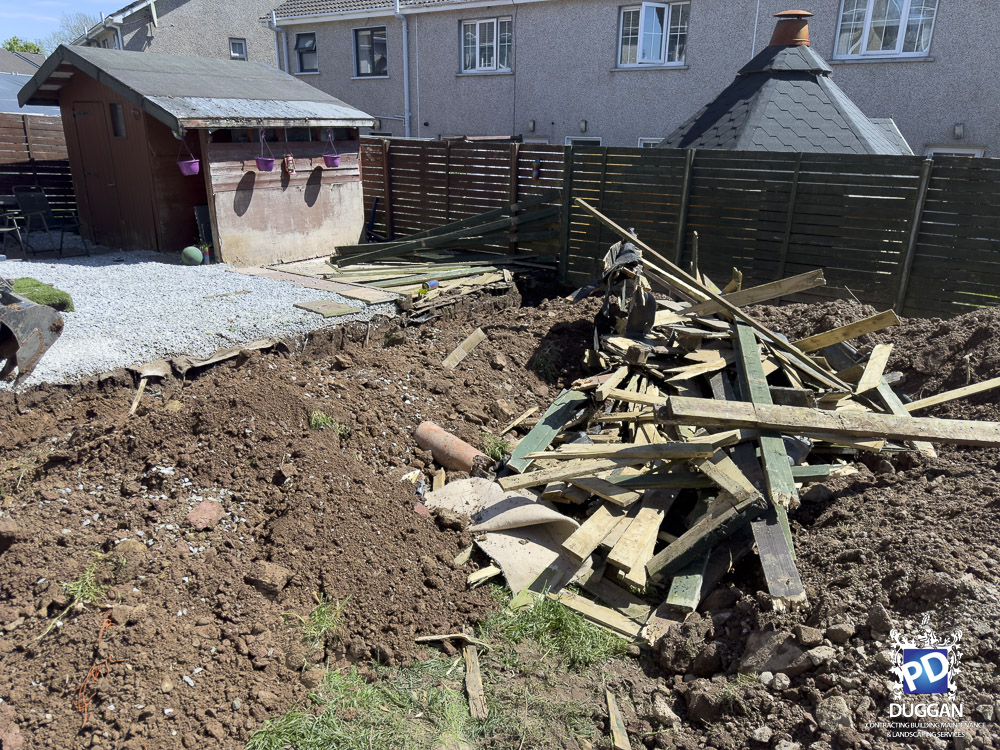
Demolition of Fence
Demolition of Fence
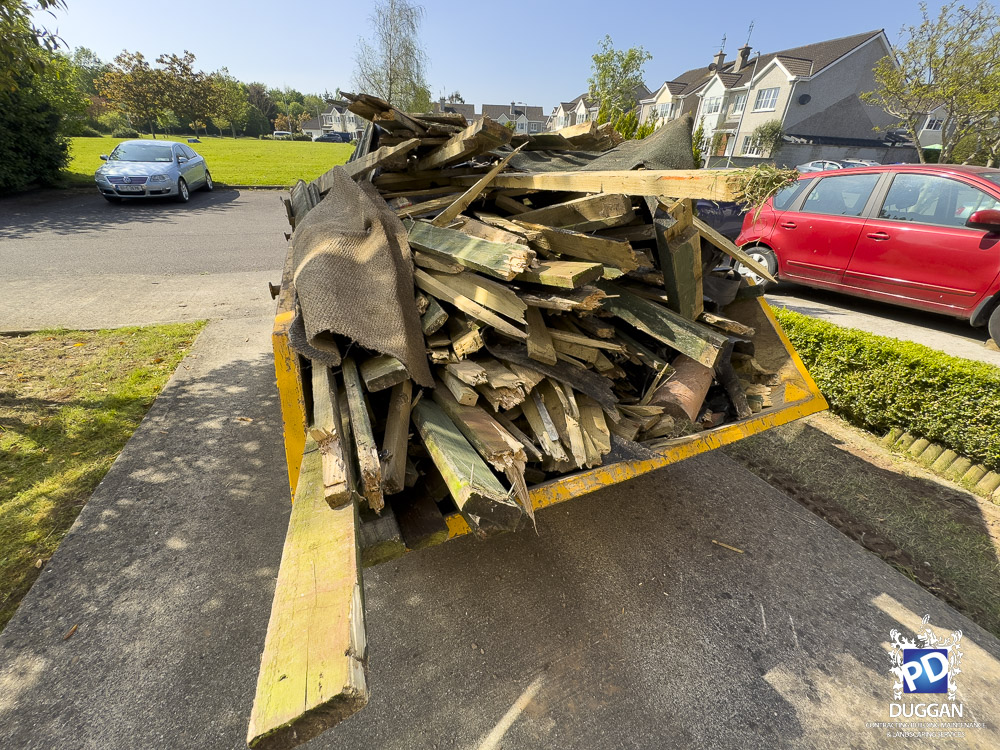
Large Skip full of Wood
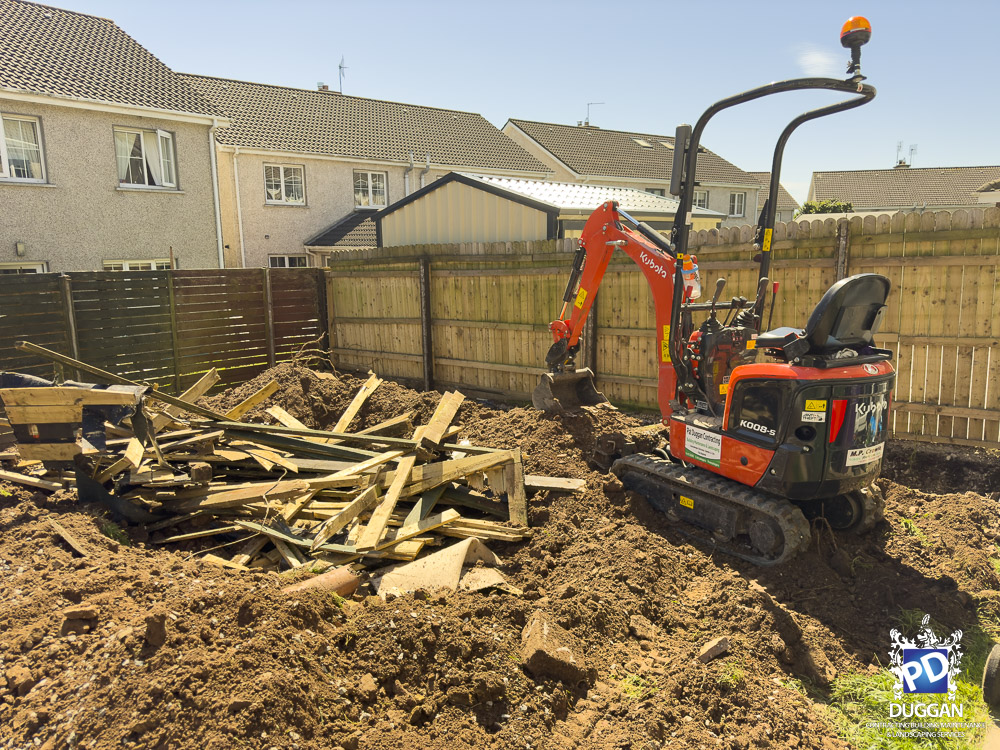
Stage 2: Trenches Dug for Foundation of Cavity Block Wall
A large perimeter foundation trench was excavated around the garden, approximately 3 feet wide and 1 to 2 feet deep, to be filled with ready-mix concrete.
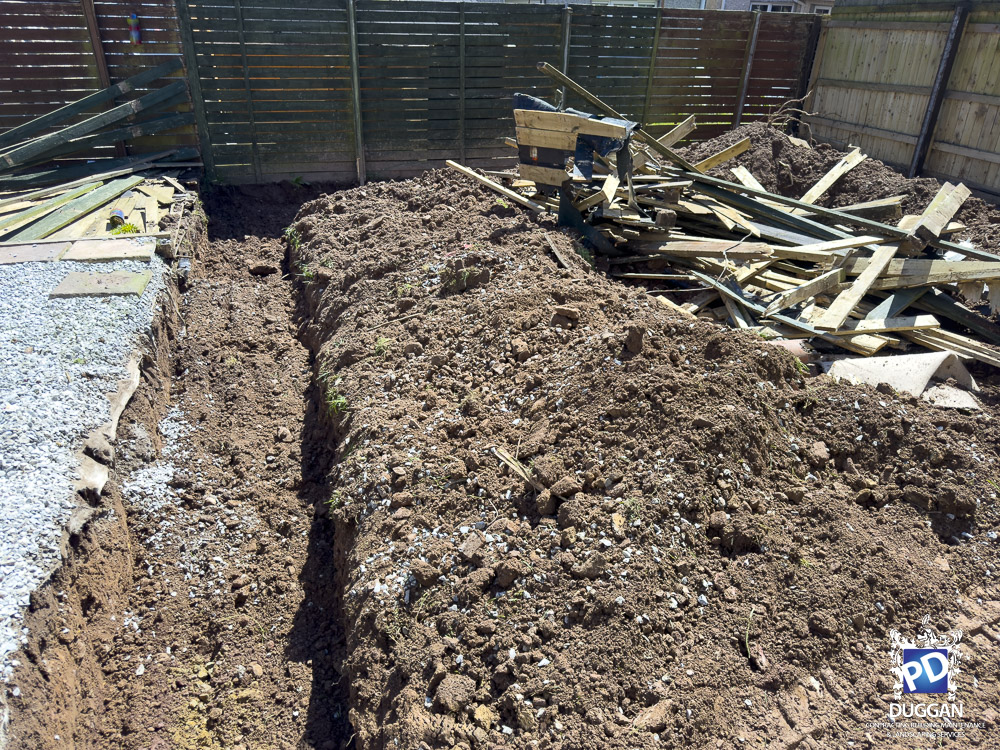
Trench around Garden
Stage 3: Concrete Ordered and Pumped
The customer placed the order with the concrete supplier and arranged for a pump truck to deliver the ready-mix concrete into the trenches. The pump truck extended over the house to access the back garden. An armoured electrical cable was laid in the trench to provide power to the shed once installed.
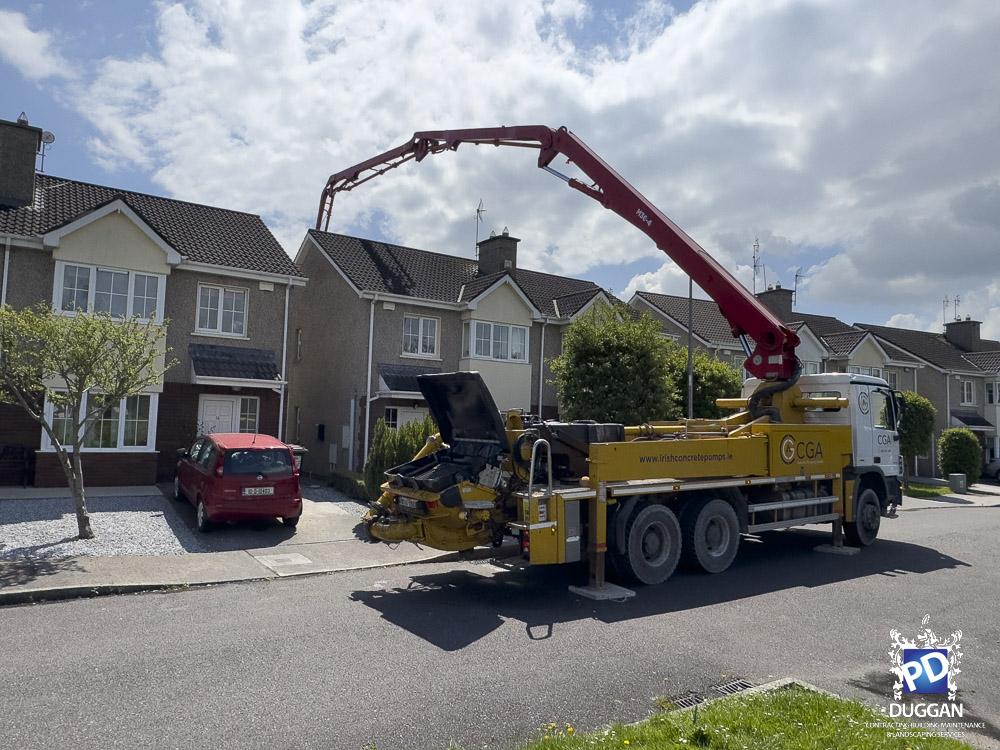
Concrete Pump
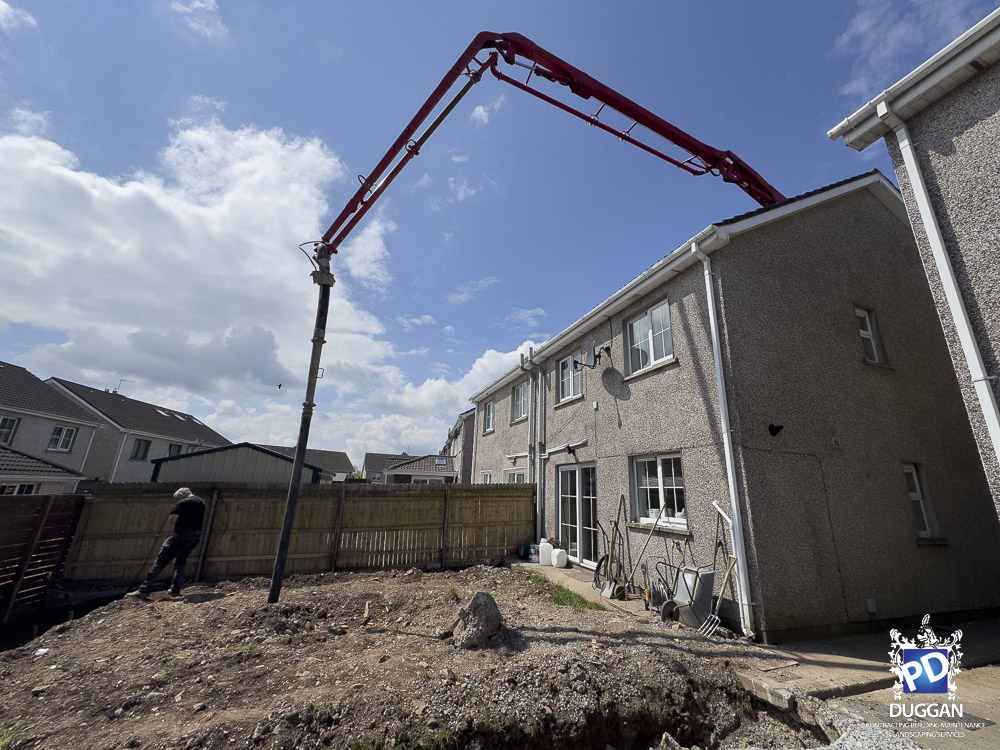
Concrete Pump

Trenches Filled with Concrete
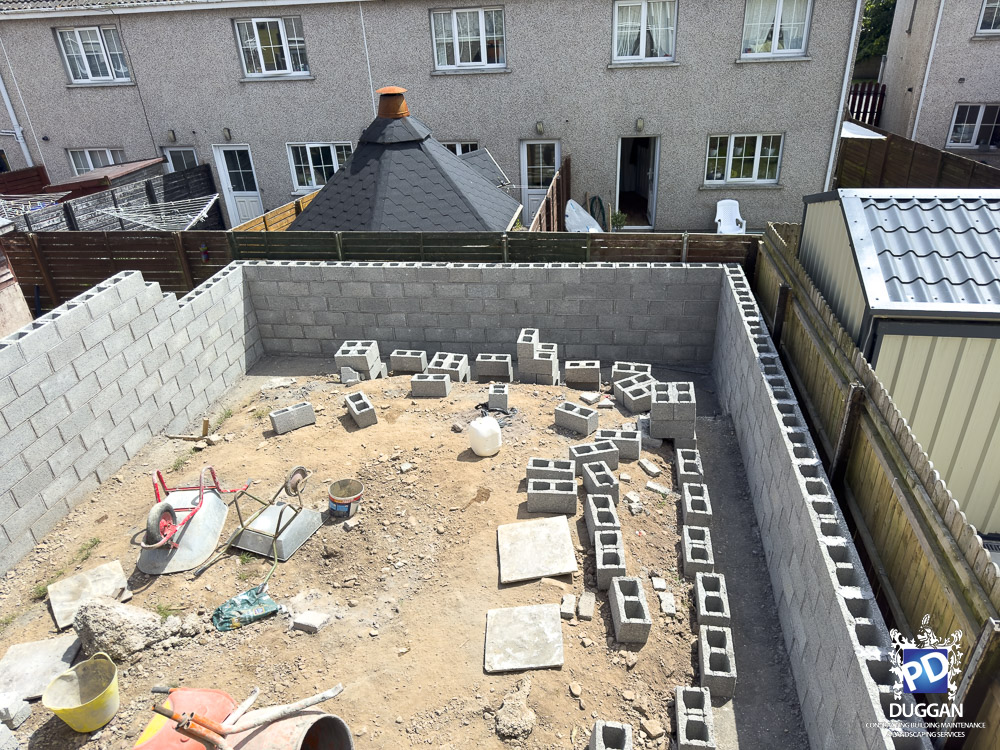
Stage 4: Cavity Block Wall Constructed
The customer arranged the delivery of blocks along with all necessary materials, including sand and cement, for the blockwork. The wall was finished with capping stones for a clean, professional appearance.
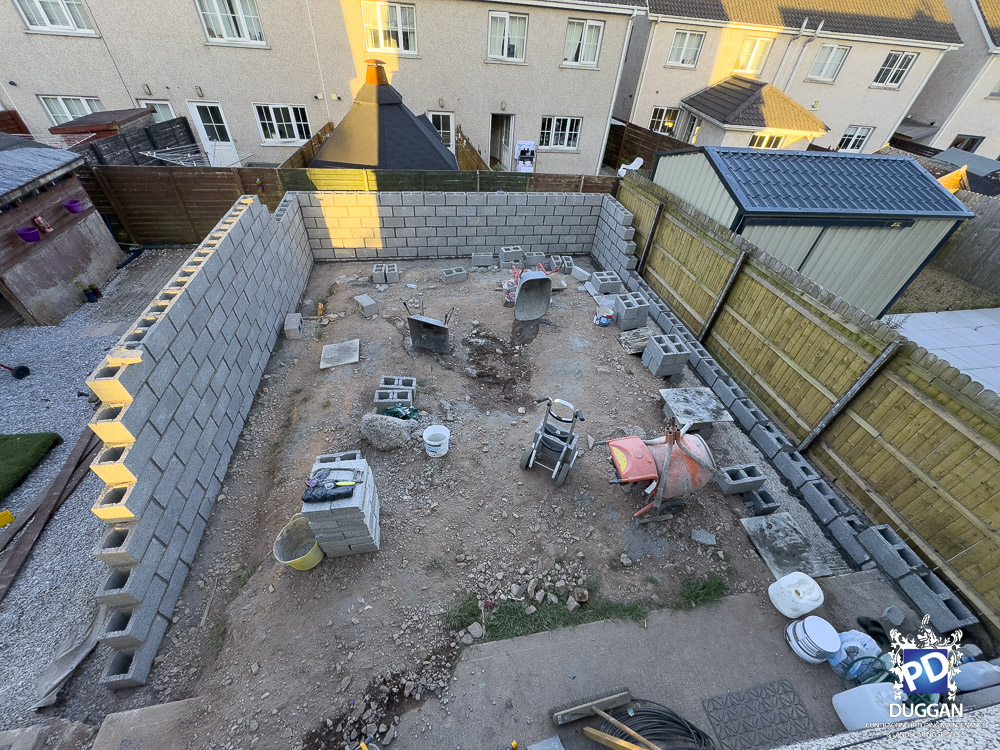
Cavity Block Wall
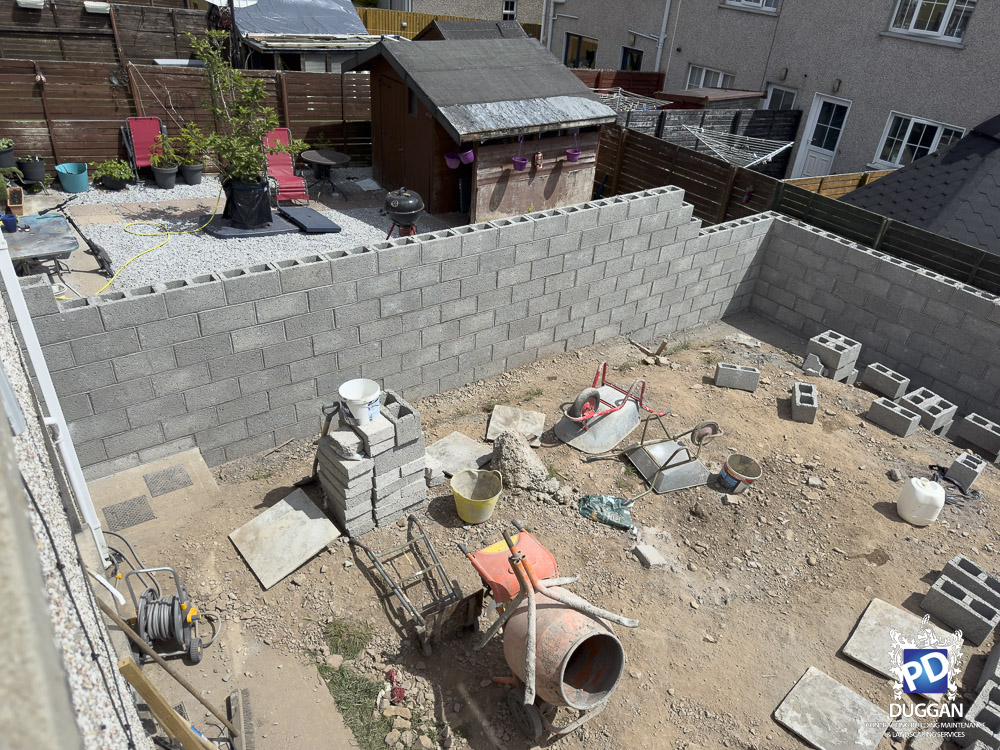
Cavity Block Wall
Cavity Block Wall
Cavity Block Wall
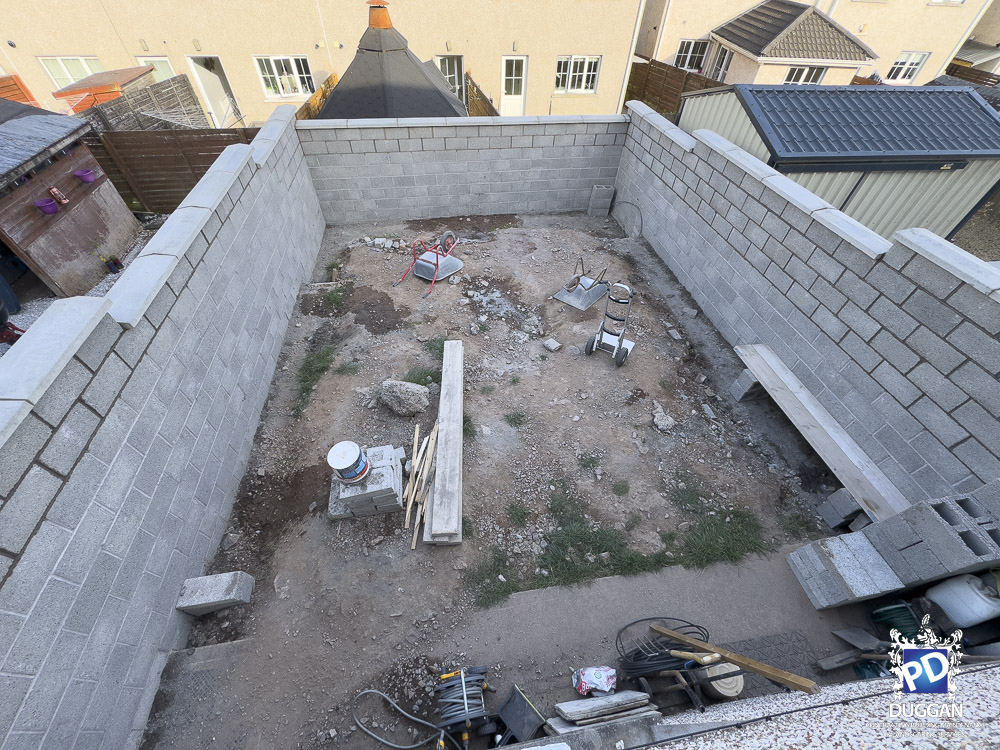
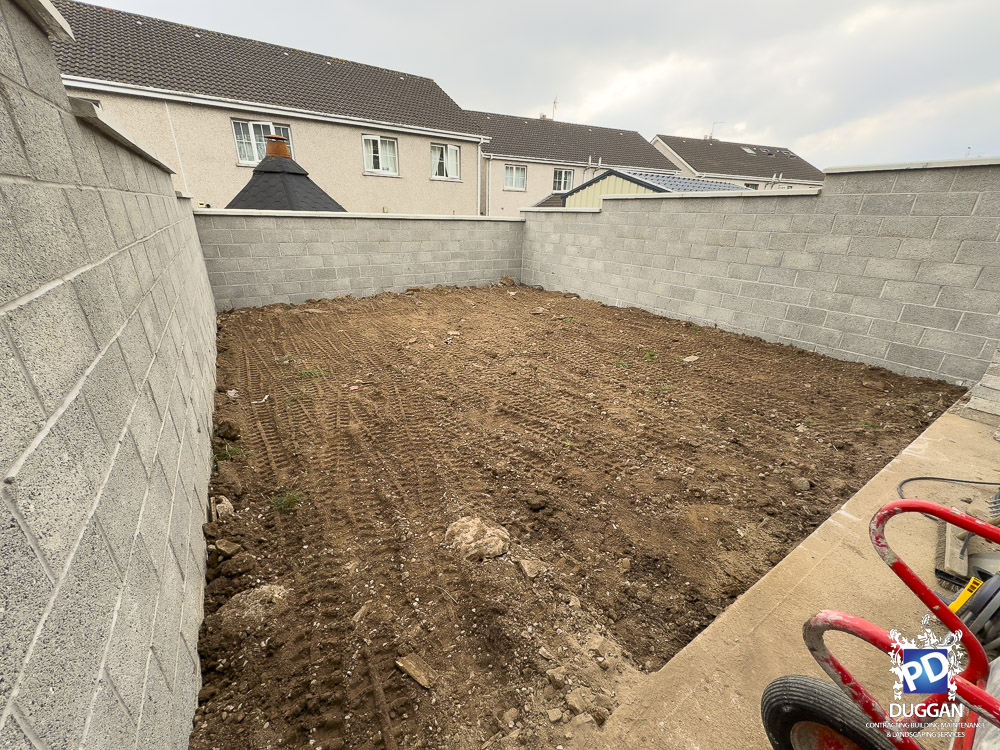
Stage 5: Levelling the Earth and installing 804 Hardcore
The customer ordered 804 hardcore, which was laid and then mechanically compacted to form a solid base.
Earth Levelled
Earth Levelled
Stage 6: Tree Planted
The customer's magnolia tree, which had been kept in a pot since they moved in, was removed and planted directly into the ground.
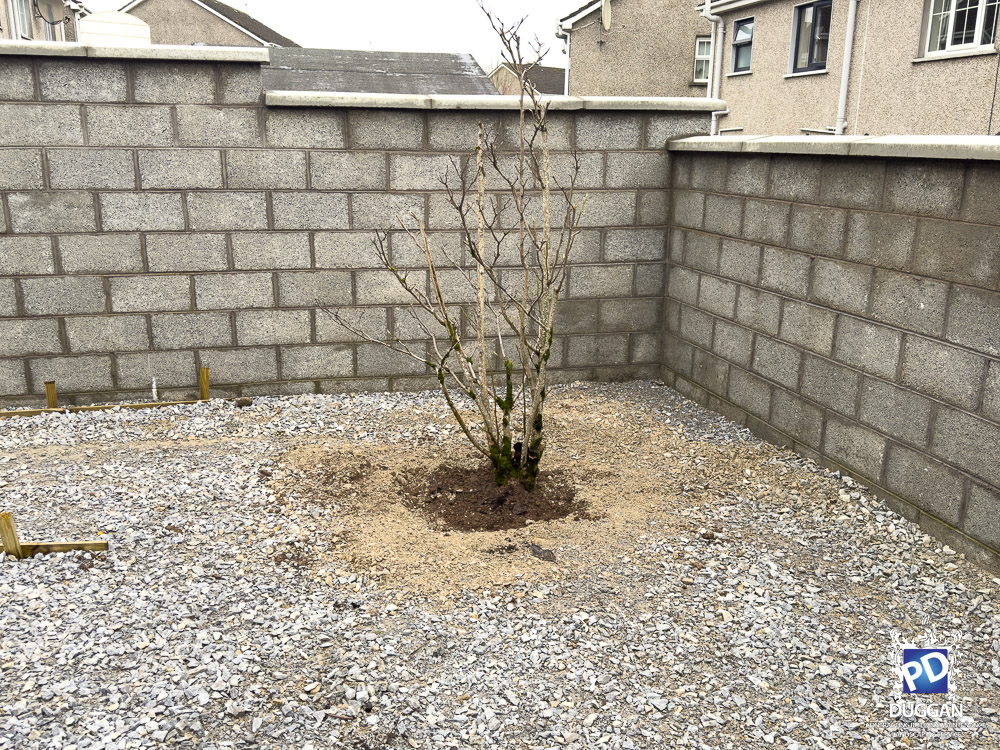
Magnolia Tree Planted
Stage 7: Porcelain Tiles Laid
The customer chose large porcelain tiles, paired with a cream-colored grout to enhance their visual contrast and make them stand out.
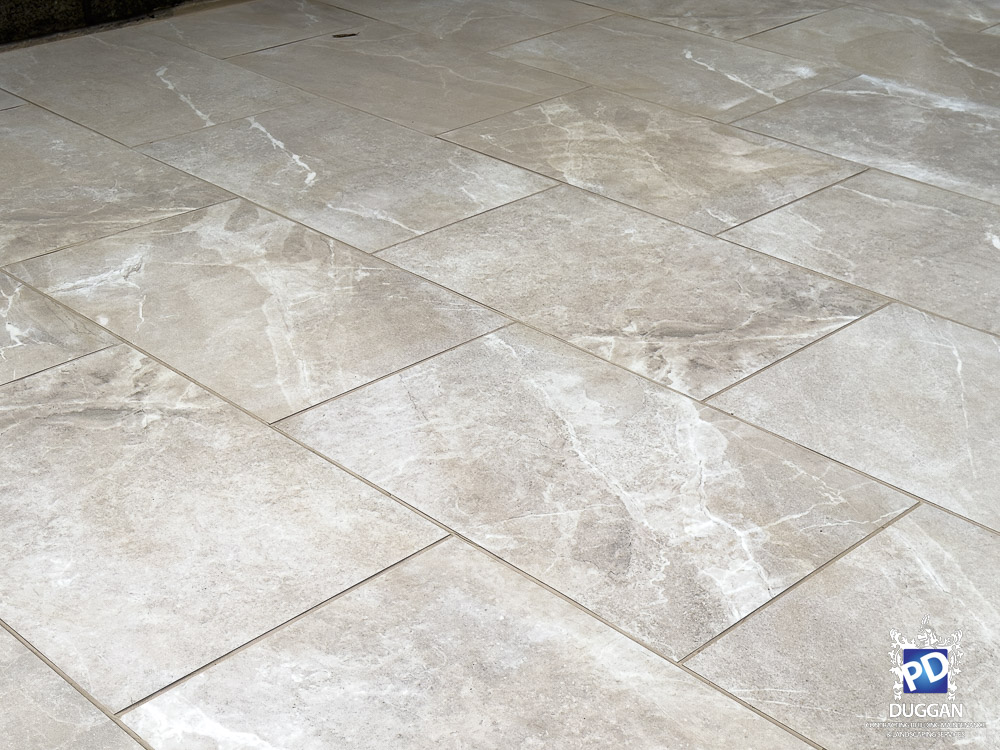
Porcelain Tiles Laid
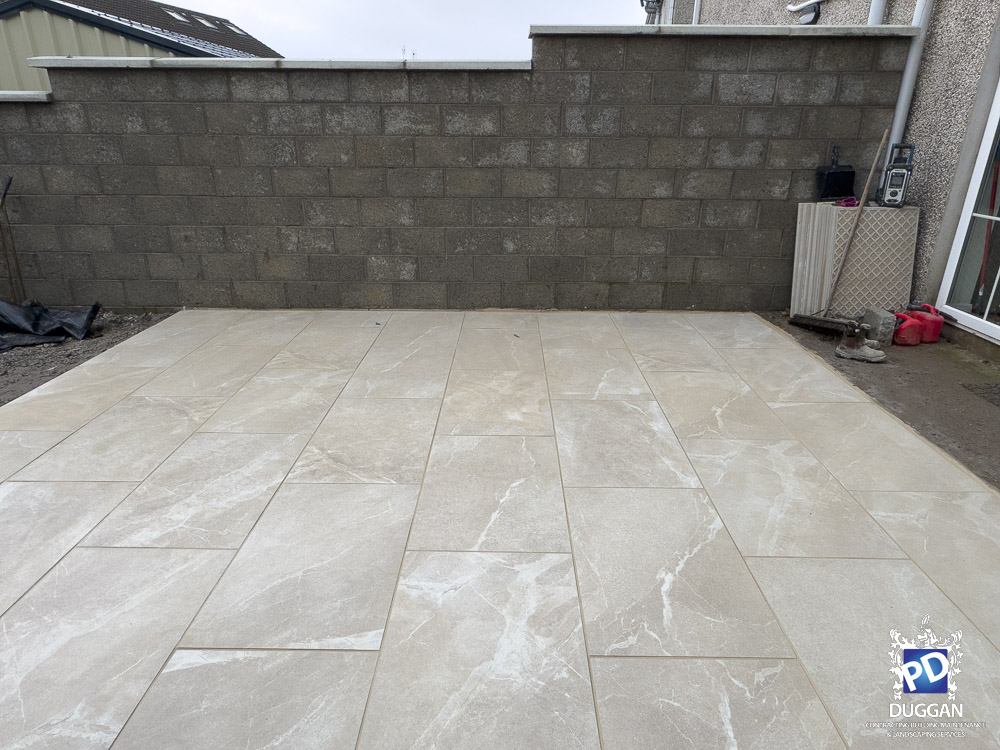
Porcelain Tiles Laid
Porcelain Tiles Laid
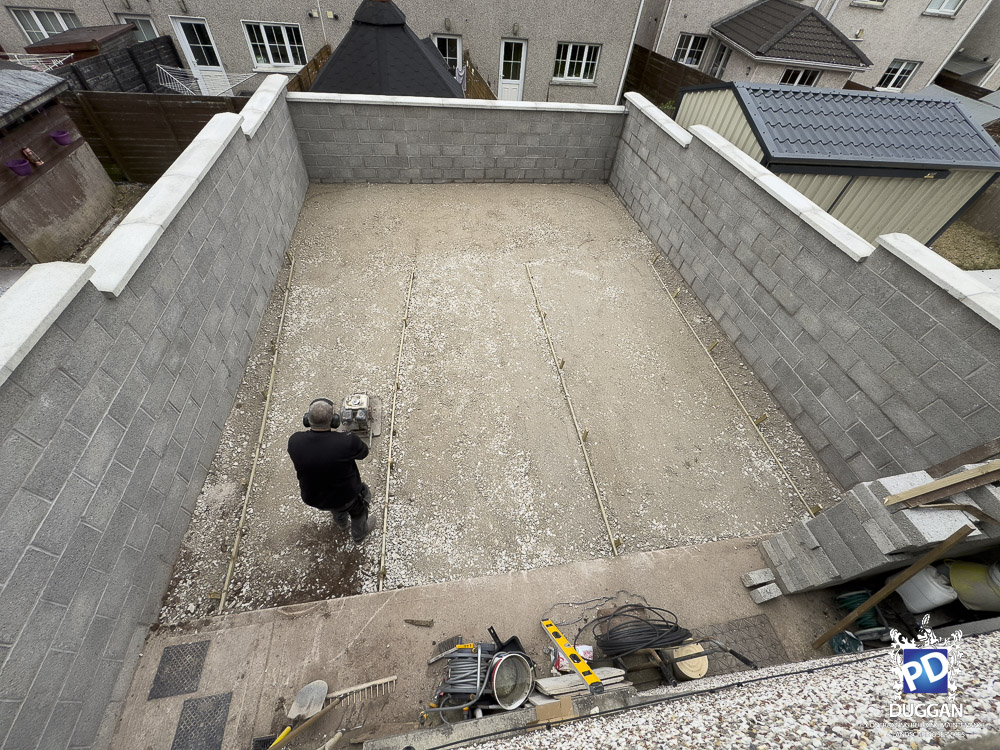
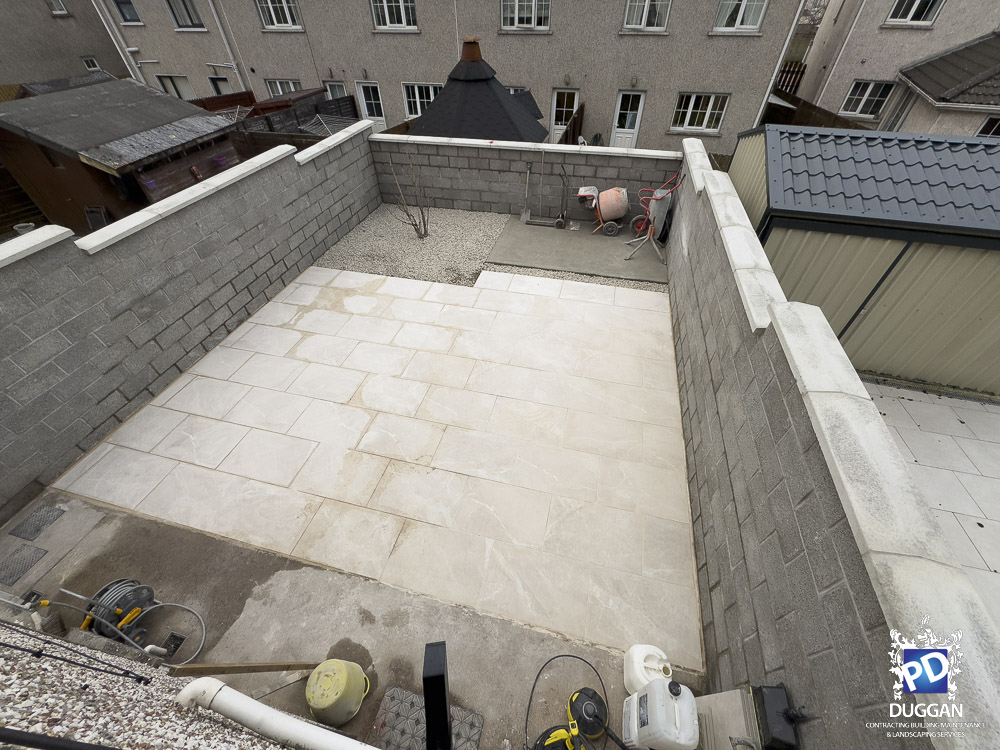
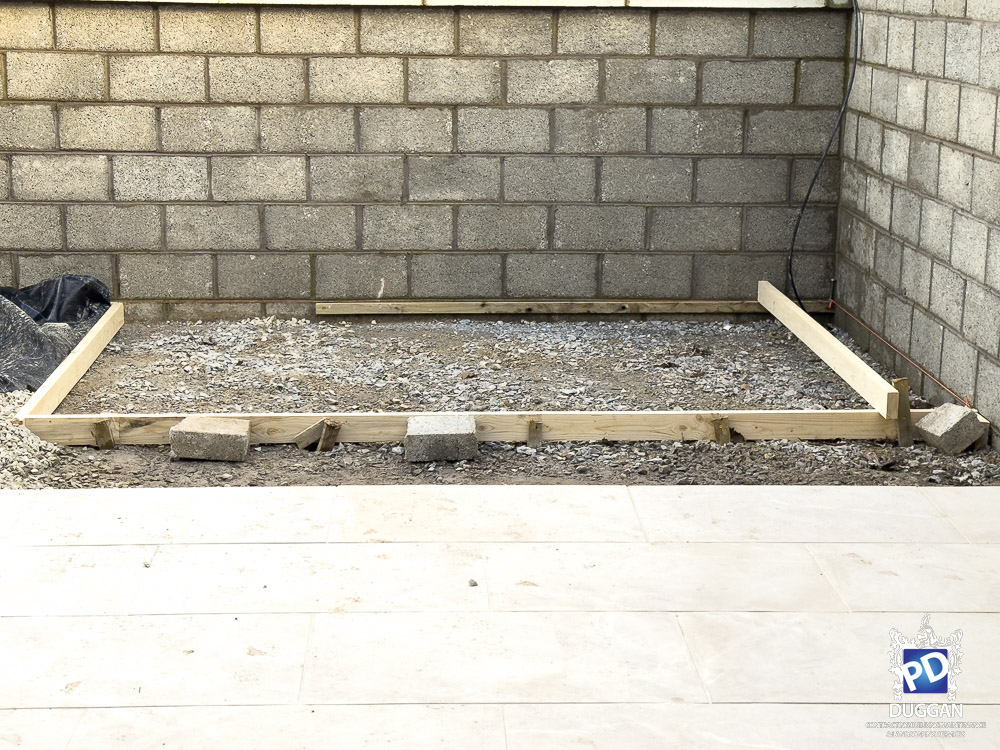
Stage 8: Base for Steeltech Shed Poured
The customer required a solid, level base for their Steeltech shed. Drawing on our experience, we constructed the base slightly larger than the shed’s footprint—an adjustment that proved beneficial during the shed’s installation.
Shed Base
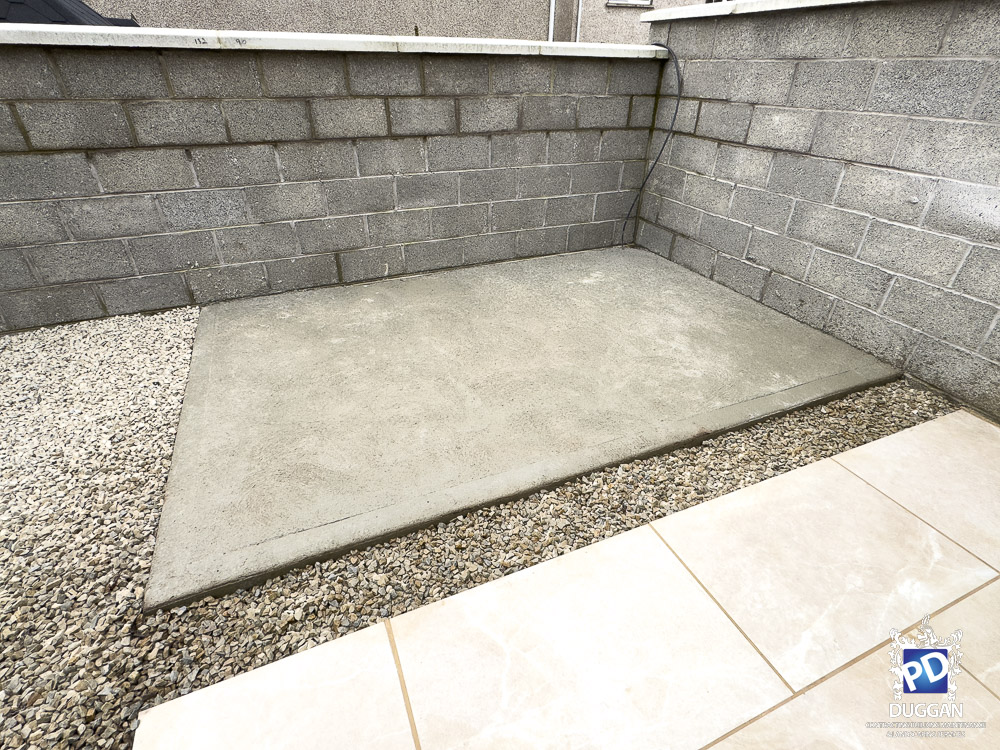
Shed Base Poured
Stage 9: Steeltech Installed the Shed
A few weeks later, Steeltech completed the shed installation, and the electrician connected power to it. Once the shed was in place, we laid a damp-proof membrane inside and carried out a final concrete pour to permanently seal the base against dampness.
Before
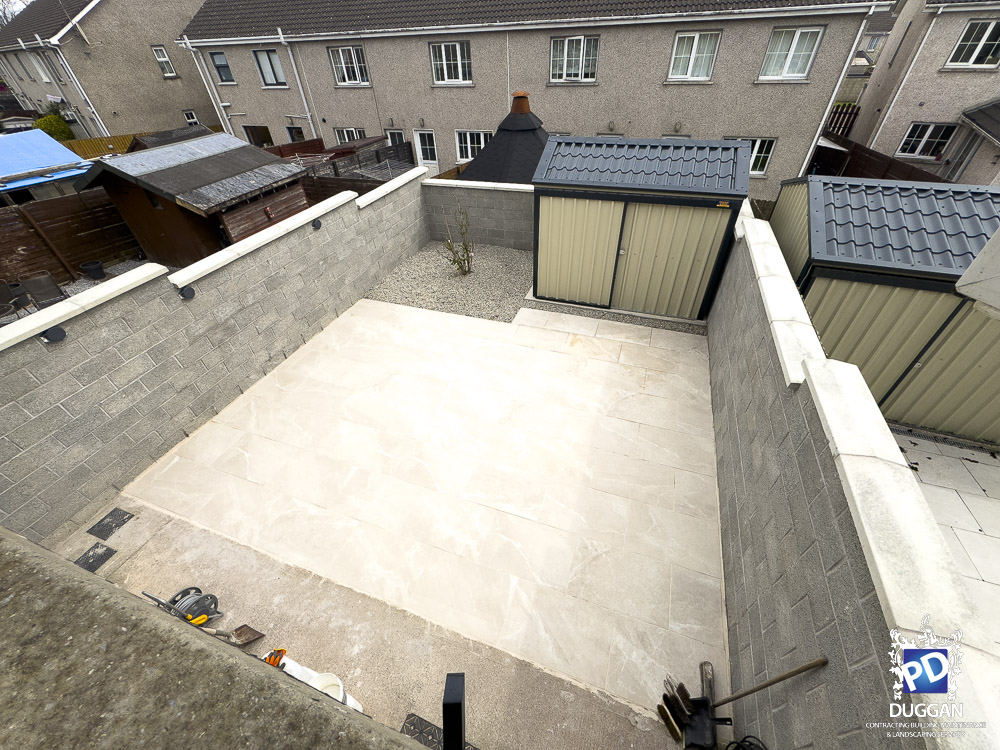
Garden Finished
The customer was delighted with the finished result—completed just in time for the arrival of good weather. They can now fully enjoy this transformed part of their home, but now they are excited to buy out some nice garden furniture.
If you're looking to turn your garden into a space you truly want to spend time in, get in touch with us. Let us work our magic for you.

